Erika & Hans' planning bio
Our adventure in Save the Dates!
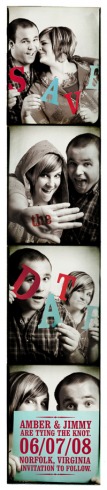
We ended up faking the photobooth because we couldn't find a good one in Austin. We borrowed a camera with a faster lens than what I own and a tripod from two of my wedding photography co-workers. We set the camera, on the tripod, on my front porch and left the door open. There's a wall right when you come in the front door where we hang keys, it has a little welcome sign, we put shoes, etc. We moved all those things and put a bar stool against the wall. With the window open, the sun was bright enough to light us but not so bright we'd be squinting or shiny.
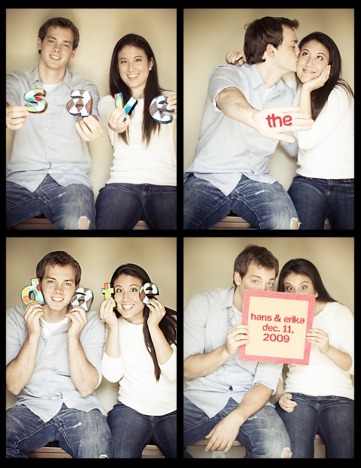
The day before, we went to Hobby Lobby and bought several sheets of colorful scrap paper. We came home and picked a font we like (I think it's called "just another font"). We printed out letters SVDT on one pattern, and AE on the other (since the a and e get used twice).
Using a remote control, we sat on the stools and held up the letters while making silly faces and generally goofed off. I think we took a good 50 or so for each frame. Then we loaded them up on my computer and picked the ones we liked. I photoshopped them into black and white, leaving the letters in color. Then I photoshopped in the "the" and the actual date (the card we're holding up is blank so we could fill in the date later - and obviously it changed after we made this sample). We thought about going with a traditional strip, but decide to make it into the newer, two side-by-side format so we could put it on a postcard and so each frame would be bigger.
Then we sent them off to vista print, added a personal note to the back and this cute little stamp we found at Hobby Lobby, and viola!
Yay.... invites.
It seemed like a good idea at the time. Anything we could find that we could afford looked really basic and cheap. We wanted something more, so we found these on the stylemepretty blog and decided to give them a the good ole DIY try.
My former landlord, the lovely Marcia Yeates, owns a printing company and graciously gifted us the paper. It's a beautiful, original gift that made us feel like someone we loved was a part of the process.
My former landlord, the lovely Marcia Yeates, owns a printing company and graciously gifted us the paper. It's a beautiful, original gift that made us feel like someone we loved was a part of the process.
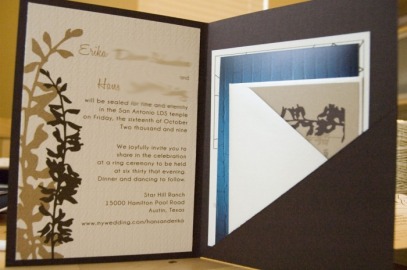
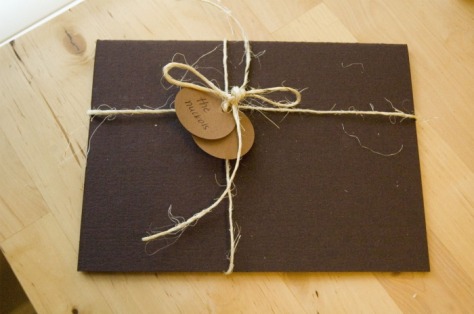
The outside folder is ESSE espresso, textured, 100lb cover paper. It's cut into a horizontal rectangle that has a triangle hanging down off the bottom right hand corner. Using a bone folder, we folded the middle to make the folder and then folded the triangle up and secured it with glue dots to make the pocket.
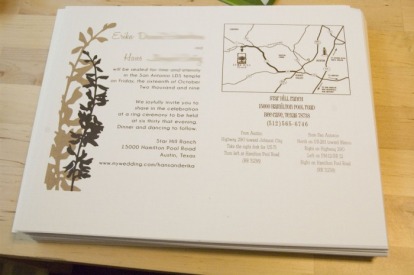
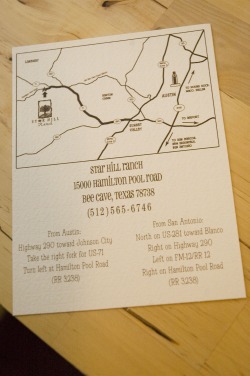
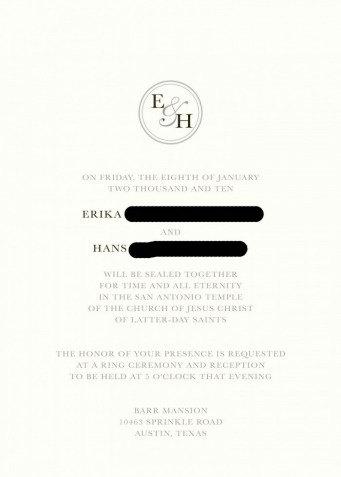
The invitation itself is printed on ESSE's latte paper, same as the map insert. For the invitation design, I did a screen grab of our wedding website than manipulated it in photoshop to create the floral pattern running up the left side of the invitation mat. The fonts are Champagne & Limousines and Honey Script. We had them printed at Quik Print on S. Lamar. More on the map inserts below. We printed the invitation and the map on the same sheet of 8.5 x 11 piece of paper and then cut them both down to size. The invitations were glued to the left side of the pocket fold with Hobby Lobby glue dots.
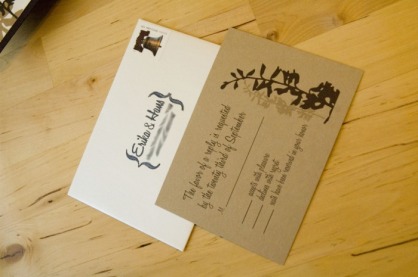
The RSVP cards were designed to match the invites. Because of the small size of the paper, it had to printed off my trusty little HP printer at home. The rsvp cards came pre-cut from Paper Source, in khaki, and the envelopes were on sale from Cards & Pockets, in metallic champagne.
The invitation itself is printed on ESSE's latte paper, same as the map insert. For the invitation design, I did a screen grab of our wedding website than manipulated it in photoshop to create the floral pattern running up the left side of the invitation mat. The fonts are Champagne & Limousines and Honey Script. We had them printed at Quik Print on S. Lamar. More on the map inserts below. We printed the invitation and the map on the same sheet of 8.5 x 11 piece of paper and then cut them both down to size. The invitations were glued to the left side of the pocket fold with Hobby Lobby glue dots.
The RSVP cards were designed to match the invites. Because of the small size of the paper, it had to printed off my trusty little HP printer at home. The rsvp cards came pre-cut from Paper Source, in khaki, and the envelopes were on sale from Cards & Pockets, in metallic champagne.
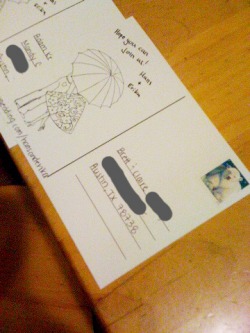
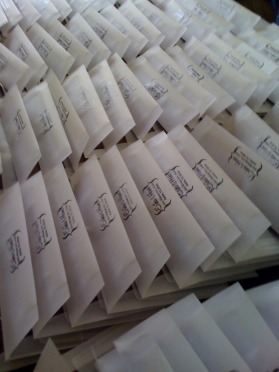
After the invites are assembled, the folder is closed and tied with raffia twine. The two tags are made from scrap paper and include names (that's our substitute for an inner envelope! They are then stuffed in a vellum (translucent) envelope, also bought from Hobby Lobby. We printed the labels off my computer (too hard to write on Vellum!). I believe the font on the brackets is called "Cricket" and I can't remember the one we used for the addresses. And then we got to use our cute return address stamp from Sweet Papery. And viola! Invitations.
Map inserts!
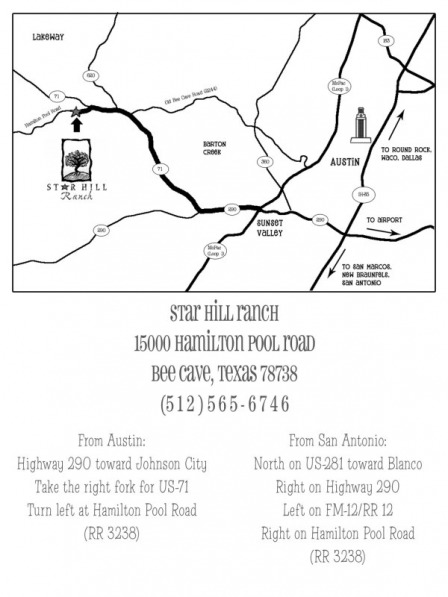
I stole this idea from knottie Ejayne. It didn't take super long and I'm really happy with how it turned out. I used google maps and took a screen shot of the map. I think pulled it into Photoshop and used layers to trace out the path. That was about it! It took a couple hours, but I was pretty picky about how it looked. You can see the instructions Ejayne recommended here and here.
Some ideas we had at one point....
Save the dates
We're going to DIY on this one. We haven't been able to find an Austin photobooth that does color yet, so we'll either go to Houston or re-create the photobooth look (fake-it). I originally want to do long skinny save the dates, but that is an odd size and would involved envelopes, so I'm now thinking doing Vista Print postcards.
Invites
This is going to be a huge DIY adventure. I love the look of letterpress invites, but seriously can't afford them. So I'm going to attempt to make my own patterned after a design I loved, but couldn't afford.
So I made this in photoshop. We'll be order paper and ink from printmakers off line, having a plate made from Boxcar Press, and then printing them at our neighborhood printing press, Slugfest.
